

Most patients with a dental implant settle into the same pattern. The implant crown is in place, the soreness is gone, chewing feels normal again, and it starts to feel like the job is finished. Then a hygiene visit comes around, the tissue bleeds when it's checked, and suddenly the question changes from “Is the implant done?” to “Am I cleaning this the right way?”
That shift matters. Implant care isn't the same as routine tooth care, and a lot of the generic advice patients hear is too broad to be useful. A single implant crown doesn't collect plaque the same way a multi-unit bridge does. A fixed full-arch restoration traps debris in places string floss may never reach well. The right answer depends on what was placed, how the restoration emerges through the tissue, and whether you're maintaining healthy tissue or trying to calm down early inflammation.
Why Implant Cleaning Is Its Own Routine
Natural teeth and dental implants don't behave the same way in the mouth. An implant restoration may look like a tooth above the gumline, but the tissues around it don't tolerate neglect in the same way. Once an implant is exposed to the mouth, a salivary pellicle forms and bacteria rapidly create biofilm, which is why daily care is framed as plaque-biofilm control, not just “brushing.” One implant hygiene review states that eliminating about 85% of plaque-biofilm every day is critical to implant health and recommends brushing twice daily with a low-abrasive dentifrice plus a nonmetal-tip oral irrigator in this implant home-care guidance.
That practical difference is where many problems start. Patients clean the visible crown and miss the margin where the restoration meets the tissue. Biofilm doesn't care that the implant is titanium or ceramic-restored. It collects where access is tight.
Why the usual hygiene script falls short
“Brush and floss” isn't wrong. It's just incomplete.
A single implant crown often needs precise cleaning at the abutment margin and between the implant and the adjacent tooth. A bridge adds under-contour spaces and connector areas. A full-arch prosthesis creates long sheltered surfaces underneath the bridge where food, plaque, and inflammation can build if the cleaning method isn't matched to the design. If you're comparing options or planning treatment, it also helps to understand how modern restorations are built and accessed in this overview of dental implant technologies.
Practical rule: If your implant cleaning routine looks exactly like your old tooth routine, it's probably too generic.
Maintenance is ongoing, not one-and-done
Implants need a continuing prevention program. Periodontal maintenance literature and implant maintenance guidance support professional follow-up at least every 6 months, and more often when risk is higher, because implant health depends on daily biofilm disruption plus periodic professional removal in areas home care can't fully control according to this maintenance review.
The routine that works is the one you can repeat without damaging the tissue, scratching implant components, or leaving the critical areas untouched.
The Numbers Behind Peri-Implant Disease
Implant cleaning isn't a cosmetic extra. It's basic disease prevention.
A recent cross-sectional study at a university-based dental clinic found peri-implant disease in 70.4% of assessed implants, with 59.2% diagnosed as peri-implant mucositis and 11.3% as peri-implantitis in this open-access review and prevalence summary. The same source reports broader weighted mean prevalence estimates of 43% to 46.8% for peri-implant mucositis and 19.8% to 22% for peri-implantitis, which tells you this isn't a rare complication limited to neglected cases.
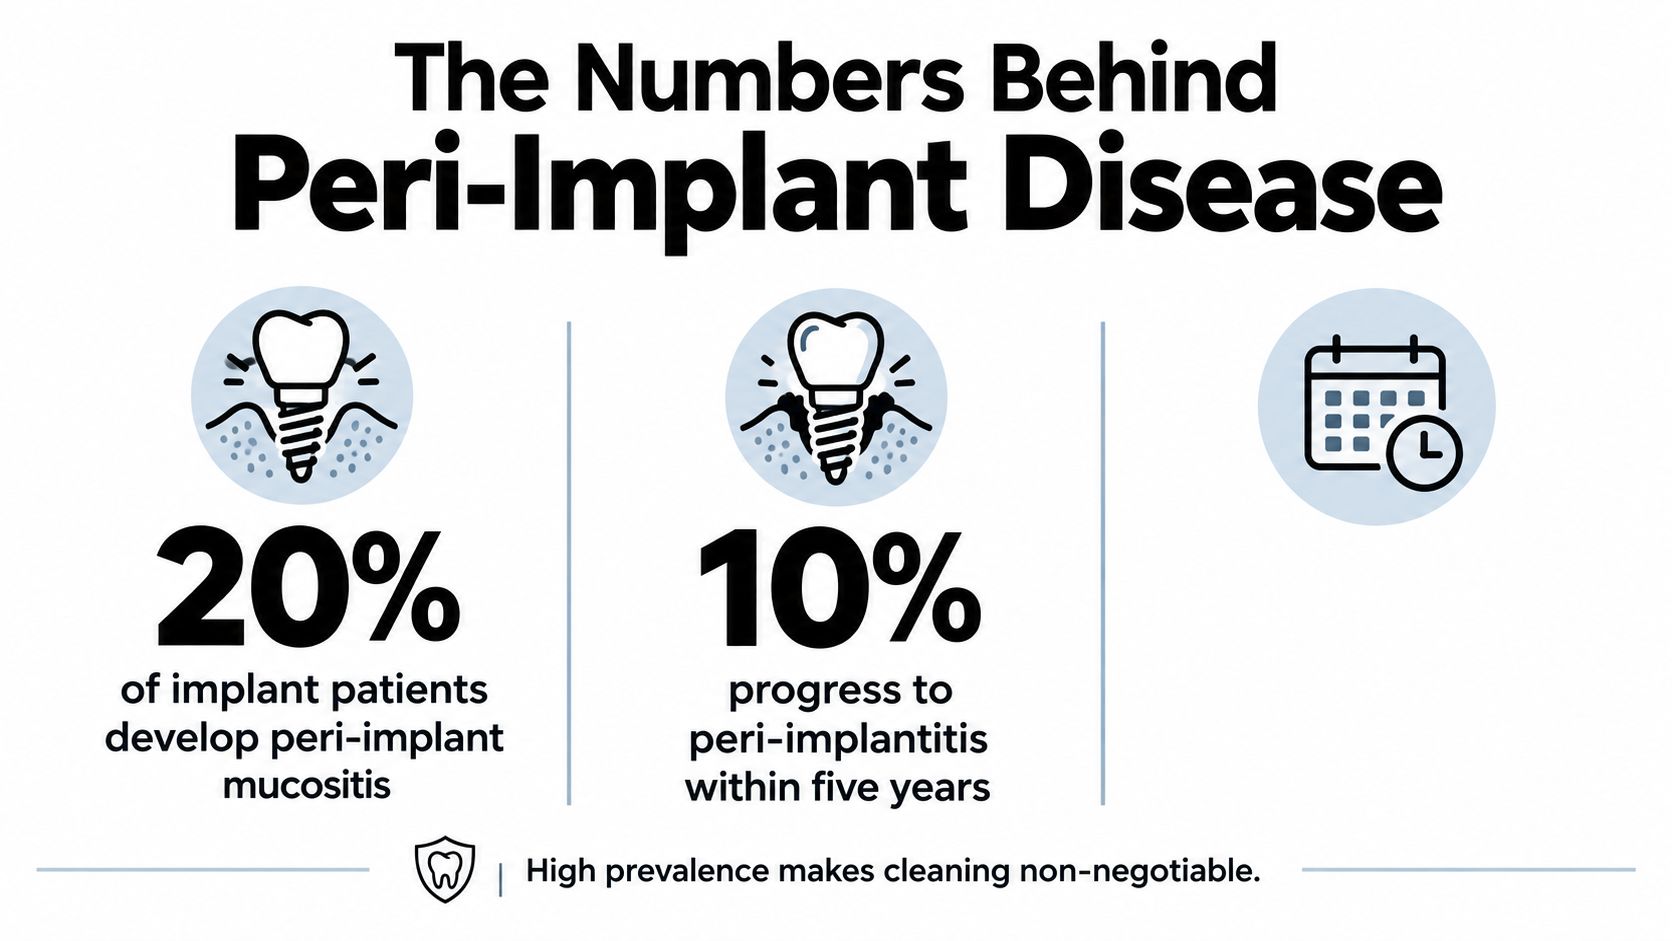
Those numbers should create urgency, not panic. Mucositis is the early inflammatory stage, and it responds best when the plaque-retentive areas are cleaned thoroughly and the home routine is corrected. Peri-implantitis is more serious because the problem extends beyond superficial inflammation and affects the supporting bone.
What the data means in real life
The main takeaway isn't that implants fail easily. It's that implants need structured maintenance. The same practitioner guidance ties implant health maintenance to monitoring, motivation, professional plaque removal, and treatment of infected sites. That's the same logic behind referring patients with bleeding and inflamed tissues for nonsurgical gum disease treatment before a small problem becomes a larger one.
Bleeding around an implant isn't “just a little gum irritation.” It's a sign that the cleaning method, access, or recall schedule needs attention.
Why prevalence changes how I advise patients
These prevalence figures are why I don't give every implant patient the same script. If inflammation around implants is common, then a single default instruction like “floss daily” isn't enough. Patients need a routine built around the design they're wearing in their mouth.
That means choosing tools by access, not habit. It also means accepting that a toothbrush alone usually doesn't reach the most vulnerable margins.
Your Daily Implant Cleaning Routine
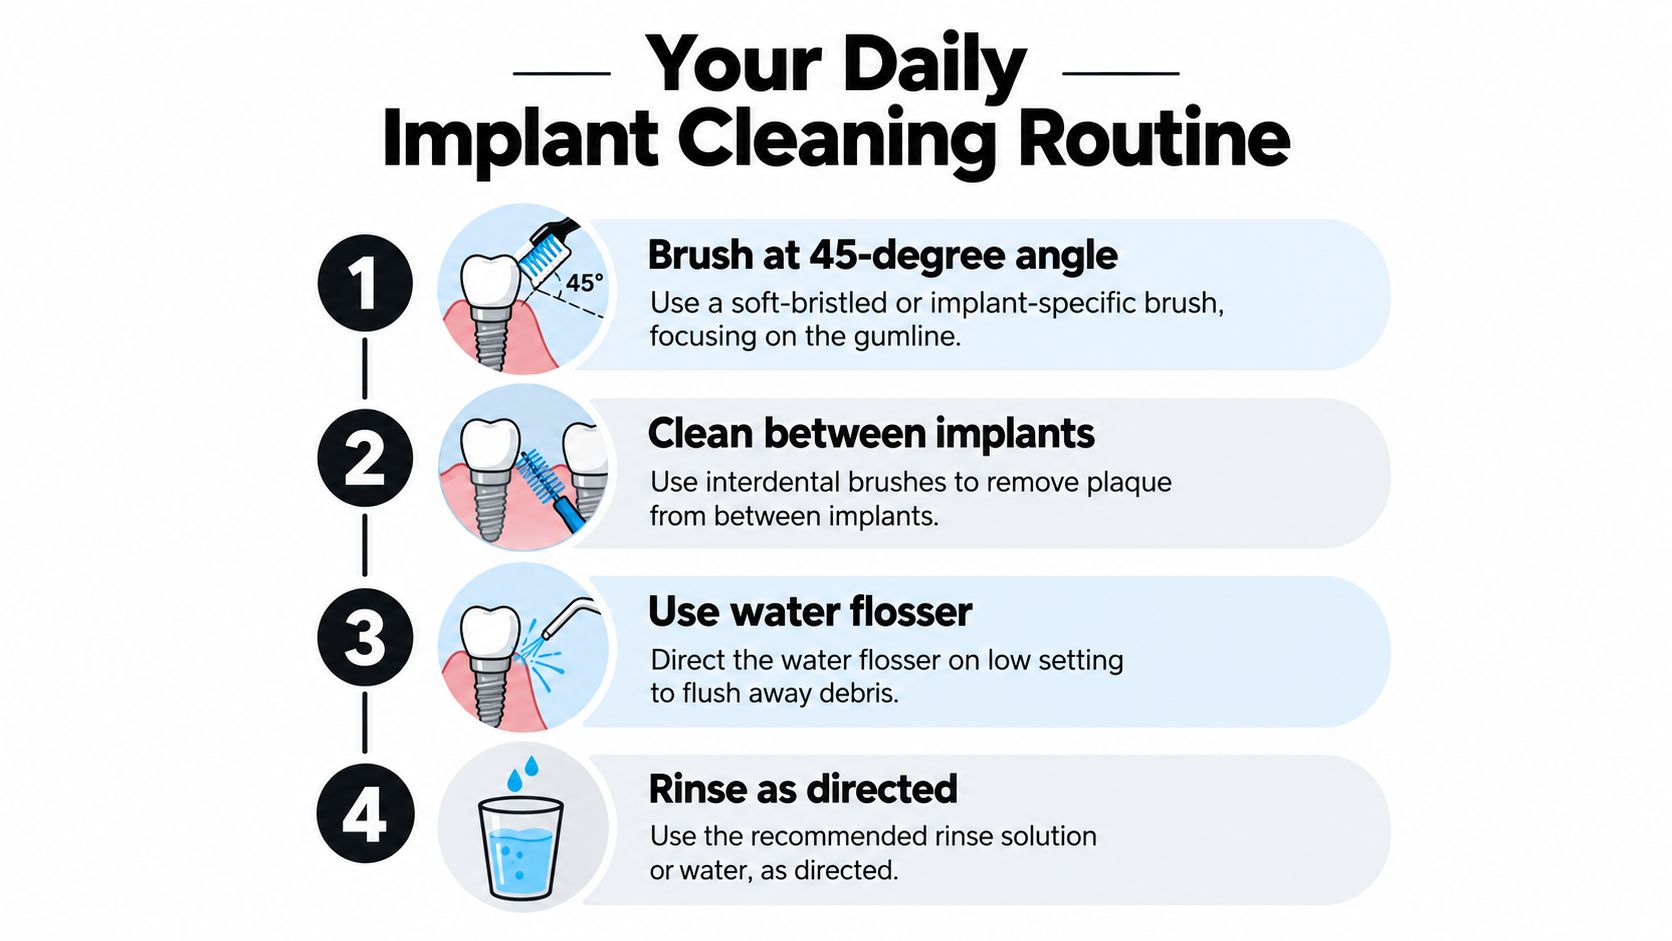
A good implant routine should be simple enough to repeat every day and precise enough to disrupt biofilm where it collects. For most patients, that means morning and night, with the evening cleaning done after the last meal so the implant doesn't sit in plaque overnight.
This visual gives the basic sequence clearly.
Step one with the toothbrush
Use a soft-bristle manual brush or a soft electric toothbrush twice daily. Place the bristles at the crown-gumline junction and use small controlled strokes. Think gentle vibration and margin contact, not hard horizontal scrubbing.
Current expert reviews support a practical protocol of brushing the crown and gumline gently with a soft-bristle or electric toothbrush and using only nonabrasive paste, because aggressive scrubbing can damage the peri-implant seal as summarized in this consensus review.
If you're still in the early recovery phase or trying to figure out when to return to your full home routine, this overview of the dental implants healing process helps separate healing-stage care from long-term maintenance.
Step two between the implant and the next surface
After brushing, clean the interproximal area with a low-trauma aid that fits the space. For many single implant crowns, an interdental brush works better than forcing string floss into a narrow contour. Around bridges, the brush often needs a different size to clean connector zones and under the pontic area.
Use the brush gently from the cheek side and tongue side if access allows. Don't snap it through. If the fit is too tight, size down. If it passes through with no contact, size up.
A useful sequence looks like this:
- Brush first: Break up the soft plaque film at the visible margin.
- Clean the embrasures next: Use an interdental brush where the implant contour leaves enough room.
- Check the underside: If you have a bridge or full-arch case, look for sheltered surfaces beneath the prosthesis.
- Rinse or irrigate last: Flush loosened debris after the mechanical cleaning.
Step three with a water flosser
For many implant patients, a water flosser is the most practical adjunct, especially around bridgework and fixed full-arch restorations. Keep the pressure low to moderate and aim the stream horizontally along the gingival margin, not directly down into the sulcus.
One comparative meta-analysis found no statistically significant difference between toothbrushing alone and toothbrushing plus a water irrigator for bleeding on probing or plaque indices, which is why I treat the irrigator as an adjunct rather than a replacement for brushing in the same review.
This video can help you visualize the motion and angulation before you try it at home.
Step four for full-arch cases
Patients with fixed full-arch restorations need to spend extra time under the prosthesis, not just around the visible front surfaces. That's where plaque, food debris, and odor tend to collect.
If you have a full-arch bridge, the underside matters as much as the smile line.
For patients who need design-specific coaching, one option is a hygiene visit with an implant-focused cleaning demonstration at Paul L. Gregory, DDS, where the team can match the tool choice to the restoration design and tissue access.
Interdental Brushes, Water Flossers, or String Floss
Standard advice often goes off track. String floss is not automatically the best default for every implant. In fact, the evidence around self-performed interproximal aids for implants is mixed, and recent reviews describe that evidence as inconclusive overall while noting that some clinical evidence favors interdental brushes or water flossers over string floss for peri-implant health in this review focused on interproximal implant care.
That doesn't mean floss is useless. It means the tool has to match the prosthesis.
A practical comparison
| Tool | Effectiveness | Best For | Limitations | Recommendation |
|---|---|---|---|---|
| Interdental brush | Strong mechanical contact where the brush fits the space well | Single implant crowns, many implant bridges | Wrong size can miss plaque or traumatize tissue | Best first choice when access is direct and the contour allows it |
| Water flosser | Good flushing action as an adjunct, especially around harder-to-reach undersurfaces | Full-arch restorations, bridge undersides, limited dexterity | Doesn't replace brushing, poor angulation can irritate tissue | Strong adjunct for complex prostheses |
| String floss | Can help in selected embrasures or where threading is easy | Certain single units with favorable access | Hard to adapt around convex contours, awkward under fixed work, can be aggressive in inflamed tissue | Supplementary tool, not the universal answer |
How I match the tool to the implant type
For a single crown, I usually prefer an interdental brush if the embrasure allows it. It gives direct plaque contact and is easier for most patients to repeat correctly than delicate floss threading.
For a multi-unit bridge, the answer depends on the underside design. If there are broad access areas under the connector or pontic, a combination of interdental brushing and water irrigation usually works better than relying on floss alone.
For a full-arch fixed prosthesis, a water flosser often becomes the main interdental adjunct because it can reach under long spans more predictably. Many of these patients also benefit from regular professional checks similar to a detailed dental cleaning visit, but adapted for implants rather than natural teeth alone.
Choose the tool that contacts the plaque without injuring the tissue. Don't choose the one people mention most often.
Professional Maintenance and Recall Schedules
Home care does most of the daily work. Professional maintenance catches what home care misses and confirms that the tissues and bone are staying stable.
For implant maintenance, expert protocols recommend regular recare every 6 months at minimum, with 3 to 4 month intervals often advised in higher-risk patients, because lack of preventive maintenance is linked to higher peri-implantitis risk in this Straumann maintenance white paper.
What should happen at an implant maintenance visit
An implant maintenance visit shouldn't feel identical to a standard polishing appointment. The clinician should identify the implant sites, assess the surrounding tissue, check for bleeding or inflammation, and clean with implant-safe instruments.
A well-run visit may include:
- Tissue assessment: Looking for redness, swelling, bleeding, or pocketing around the implant restoration.
- Biofilm removal: Using methods designed for implants rather than abrasive polishing meant for enamel.
- Calculus management: Removing hardened deposits carefully if present.
- Access beneath prostheses: Cleaning under fixed bridgework where home tools don't fully reach.
- Radiographic comparison when indicated: Checking supporting bone levels over time.
Which instruments matter
The details matter here. Expert protocols recommend low-abrasion powder air-polishing with erythritol or glycine powders sized about 14 to 25 µm for biofilm removal, followed by low-lavage ultrasonic debridement and titanium-specific scaler tips with short horizontal strokes if calculus remains from the same maintenance protocol.
What shouldn't be used around implants is just as important. APF-containing prophy paste should be avoided, and instrumentation should be implant-safe rather than casually interchangeable with routine tooth scaling.
How often to book
A low-risk patient with stable tissues may do well on a 6-month schedule. A patient with prior peri-implant inflammation, more difficult prosthesis design, or other risk factors often needs 3 to 4 month maintenance.
If you're already on periodontal follow-up, implant recare is usually coordinated well through a structured dental periodontal maintenance schedule instead of being treated like a standard recall.
Tell the hygienist and dentist that you have implants, even if they already know. It changes the instrumentation, the cleaning targets, and often the recall interval.
Warning Signs and Common Mistakes to Avoid
The earliest implant problems usually don't start with pain. They start with subtle inflammation that patients brush off for too long.
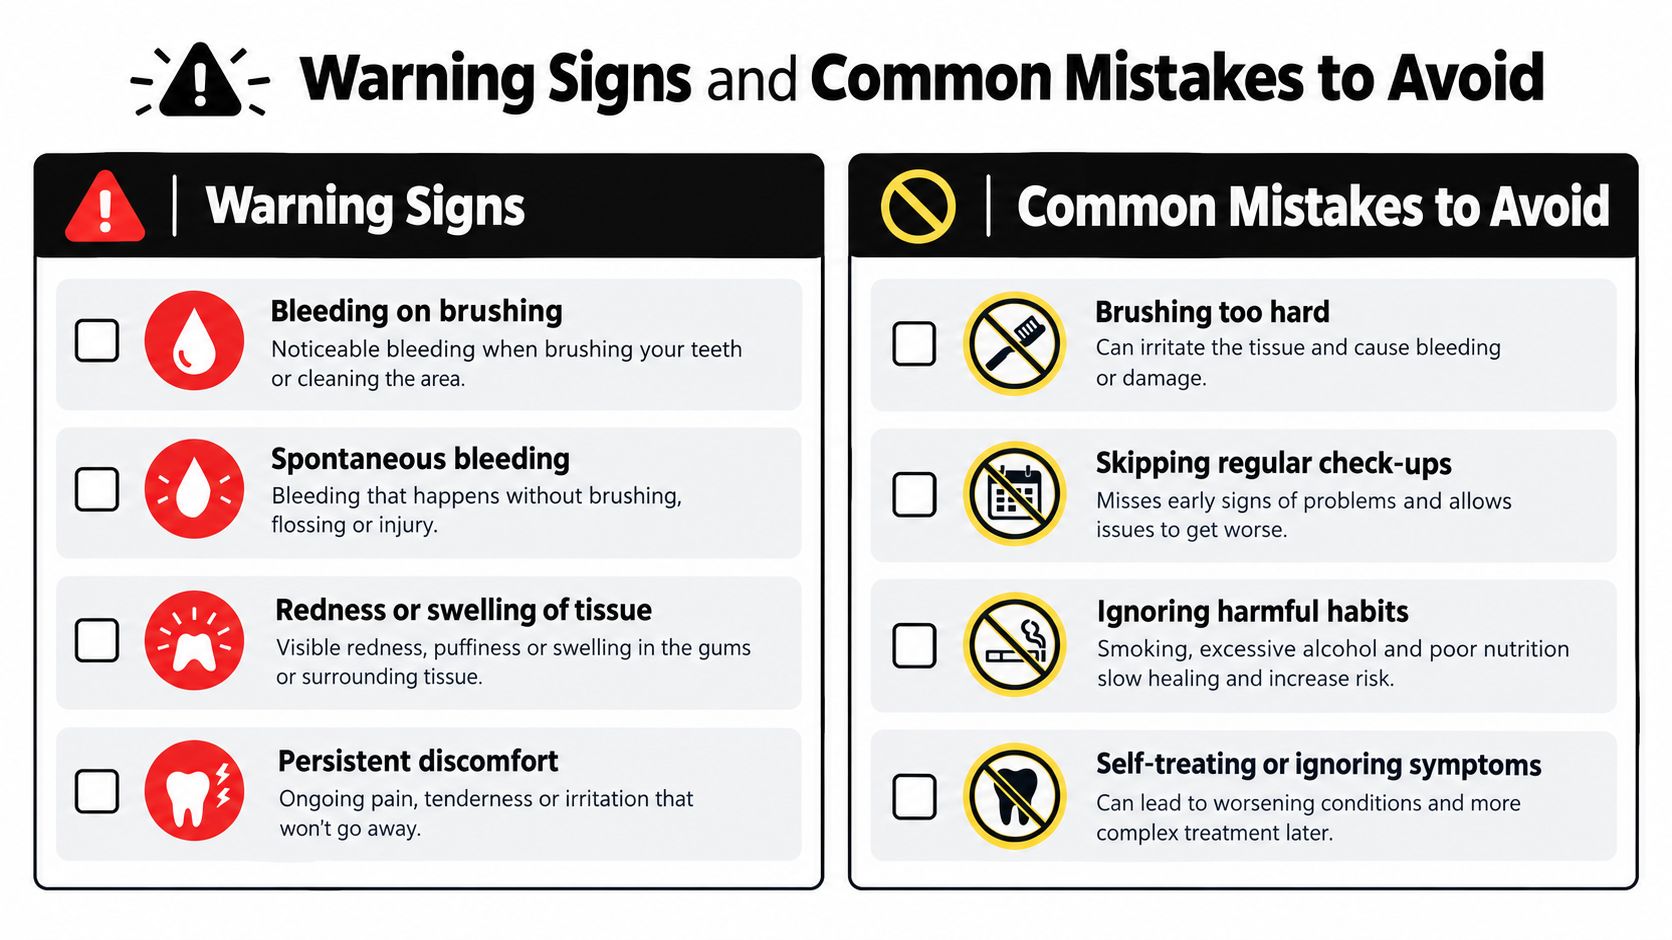
If you notice bleeding on brushing, spontaneous bleeding, redness or swelling of the tissue, persistent bad taste or odor, pus discharge, or mobility of the restoration, don't wait it out. Some of these findings can reflect reversible mucosal inflammation. Others need prompt evaluation because the supporting structures may already be involved.
What each warning sign should make you do
Use a simple response rule:
- Bleeding only during cleaning: tighten up your home routine and schedule an earlier maintenance visit.
- Redness, swelling, or persistent odor: book an evaluation instead of just switching toothpaste and hoping it settles.
- Pus or increasing soreness: call promptly. That needs direct examination.
- A loose-feeling crown or prosthesis: don't keep chewing on it and don't assume the implant failed. The restoration may need adjustment, but it still needs attention quickly.
Minor bleeding around an implant is common. Normal is a different question. Healthy implant tissue shouldn't keep bleeding day after day.
Mistakes that make things worse
A lot of damage comes from well-meant overcleaning.
Common mistakes include:
- Aggressive scrubbing: Rough technique and abrasive pastes can damage the peri-implant seal.
- Wrong water-flosser angle: The Straumann guidance warns against directing the jet into the sulcus instead of horizontally, because that can traumatize the tissue seal.
- Using metal tools at home: Patients sometimes try picks or scalers. That can scratch components and create more plaque retention.
- Forcing floss under inflamed tissue: Recent expert reviews specifically caution against forcing floss under rough implant surfaces when peri-implant bone loss is present.
- Ignoring repeated bleeding: Inflammation progresses faster when nobody intervenes.
The best outcomes come from catching changes early, adjusting the cleaning method, and getting professional help before the condition moves beyond superficial tissue inflammation.
A Long-Term Mindset for Implant Health
Implants last well when the routine is boring, consistent, and specific. The patients who do best usually aren't doing anything fancy. They're repeating the right small steps every day, using tools that fit their restoration, and showing up before small warning signs become larger treatment problems.
That mindset also needs to evolve over time. A newly restored single crown may stay healthy with straightforward brushing and a well-fitted interdental brush. A bridge with awkward emergence contours may need more irrigation. An implant site that has already had a mucositis episode usually deserves tighter recall and closer self-monitoring.
A simple checklist worth saving
Keep the routine practical.
- Every morning: Brush the implant restoration gently at the gumline with a soft manual or electric brush.
- Every evening: Repeat brushing after the last meal, then clean the interproximal or underside areas with the aid that fits your prosthesis.
- For bridges and full-arch cases: Use your water flosser regularly as an adjunct, aimed along the margin rather than into the sulcus.
- When brushes wear out: Replace interdental brushes as soon as they bend, splay, or stop contacting the surfaces cleanly.
- Once a month: Look closely at the tissue around the implant for redness, swelling, or a change in contour.
- If bleeding starts: Don't downgrade it to “just irritation.” Tighten the routine and schedule a professional check.
- On your recall schedule: Keep the maintenance visit that matches your risk level, not just the one that fits your calendar.
The right goal
The goal isn't to sterilize the mouth. The goal is to disrupt biofilm consistently without damaging the implant environment.
If you're trying to figure out how to clean dental implants properly, start with the restoration type you have. Single crown, bridge, and full-arch cases don't all need the same tool, and they definitely don't all respond well to the same generic flossing advice.
A maintenance routine should feel sustainable. If it feels too complicated to repeat, simplify it. If it isn't controlling bleeding, change it.
Paul L. Gregory, DDS provides implant planning, restorative care, professional maintenance, and ongoing monitoring for patients with single-tooth implants, bridges, and full-arch restorations. If you want a cleaning routine matched to your implant design instead of generic advice, visit Paul L. Gregory, DDS to schedule an evaluation and maintenance visit.