

You're sitting in the dental chair, trying not to move while a thin sensor rests behind your teeth. The exposure itself is over almost before you have time to wonder whether it worked. A moment later, the image appears on a monitor, giving your dentist a view of areas a mirror, probe, and good lighting can't reveal.
That's the everyday experience of a digital X-ray for teeth. It's a focused diagnostic step that can reveal decay between teeth, changes in bone levels, root anatomy, or an infection hidden beneath an apparently normal surface. The technology is quick, but the decisions behind it matter: which image is needed, how the equipment is positioned, and whether an existing image can answer the question without taking another one.
This guide explains how digital dental X-rays work, what radiation dose means in practical terms, what each type of image shows, and what you'll feel during the appointment. It also addresses pregnancy, shielding, retakes, and the questions that help you take part in a lower-exposure, better-organized imaging plan.
A Quick Look Inside the Mouth
The dental assistant places a small sensor inside your mouth and asks you to close gently. You may feel firm pressure against the palate or the floor of the mouth, but there's no film packet to hold in place and no chemical processing period afterward. The X-ray source makes a brief exposure, and the image travels to the computer almost immediately.
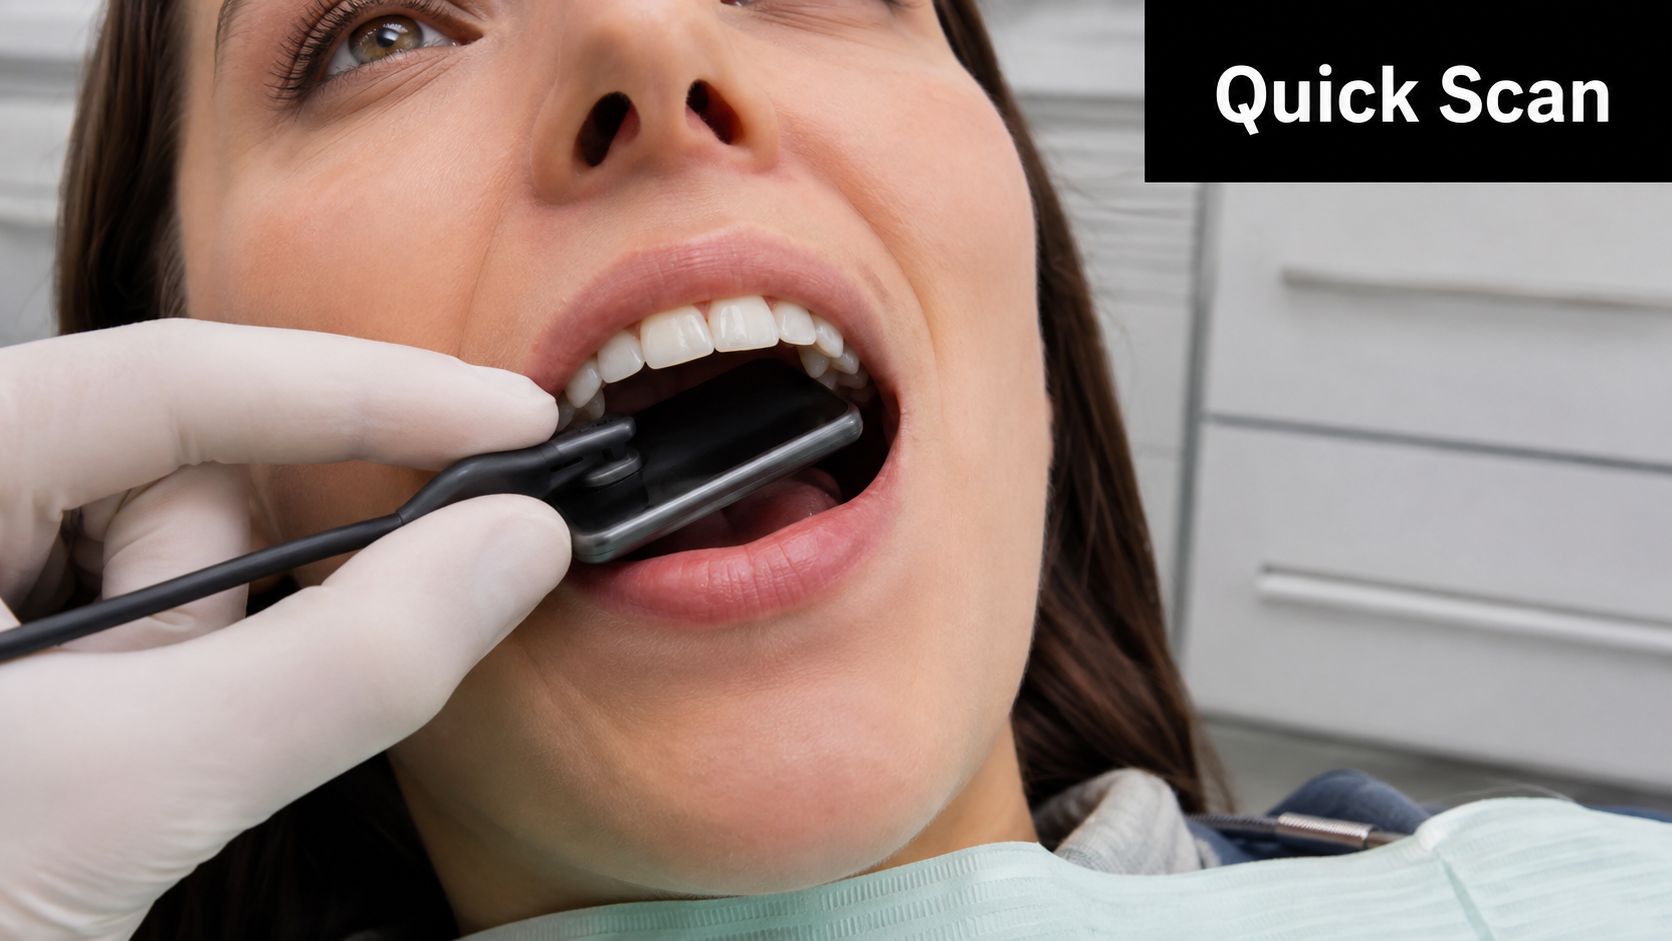
A bitewing image, for example, shows the upper and lower back teeth together. Your dentist can inspect the contact points where cavities often begin, the height of the supporting bone, and the edges of existing fillings. A periapical image goes farther, showing an individual tooth from its crown to the root tip when pain, trauma, root-canal concerns, or infection requires a closer look.
Older film-based imaging followed a different rhythm. The film had to be positioned, exposed, removed, and processed before anyone knew whether the angle was correct. If the image missed the area of concern, the process had to be repeated. Digital systems let the dental team review the result on the spot, which helps them identify a positioning problem before you leave the chair.
What you notice: The radiation exposure is silent. The part you're most likely to feel is the sensor, not the X-ray itself.
The image also becomes easier to discuss. Your dentist can enlarge a region, adjust contrast, and point to a dark area between teeth or a change around a root while you look at the same screen. That shared view can make an unfamiliar recommendation more understandable.
A digital image doesn't replace a clinical examination or your description of symptoms. It adds information from inside the tooth and jaw. If you're reviewing the rest of your preventive visit, the dental cleaning process is a separate step that removes deposits and lets the hygienist assess visible gum and tooth surfaces. Digital imaging answers questions those hands-on steps can't reach.
How Digital Dental X-Rays Actually Work
A useful comparison is the change from a film camera to a smartphone. Both record light, but the smartphone turns light into an electronic image that can appear, enlarge, and store information almost instantly. A digital dental X-ray does something similar with X-ray energy.
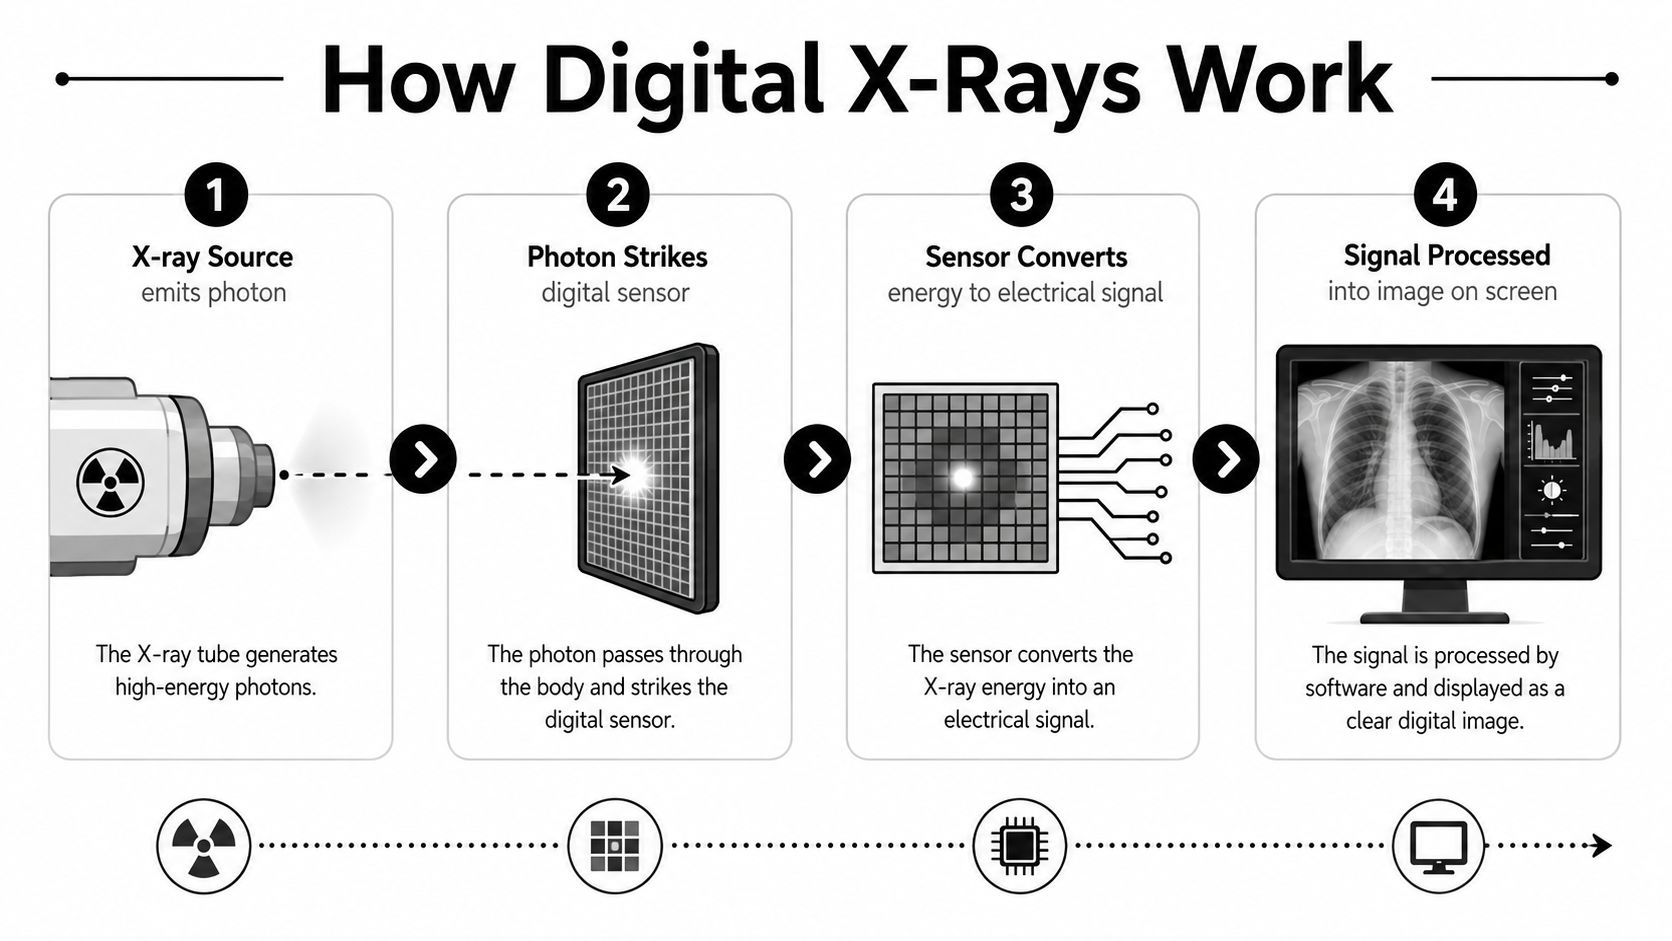
From photon to picture
- The X-ray tube sends photons toward the teeth and jaw.
- Some tissues absorb more of the energy than others. Dense enamel and bone appear lighter, while areas that allow more X-rays through appear darker.
- The receptor receives the remaining energy and converts it into an electrical signal.
- Software processes that signal into pixels, then displays the image on the computer monitor.
With film, the X-ray energy changes a film emulsion that must be chemically developed. With digital radiography, a sensor captures the exposure electronically. That difference explains the rapid display and makes it possible to adjust brightness or contrast after the image is taken.
Three sensor families
CCD and CMOS sensors use silicon chips that convert incoming X-ray information into an electronic signal. They're connected to the imaging system, often by a cable, so the result can appear very quickly.
PSP, or storage phosphor plate, systems look more like a thin film receptor during placement. After exposure, the plate goes into a scanner that reads the stored image and sends it to the computer. The workflow isn't quite as immediate as a wired sensor, but the plate can be flexible and familiar to the clinical team.
The important patient-facing point is sensitivity. Modern digital receptors generally respond to X-rays more efficiently than older film, and their greater dynamic range gives the system more room to record differences in tissue density. Technical evaluations consider measures such as the modulation transfer function and detective quantum efficiency, but you don't need to interpret those metrics to understand the practical result. A more sensitive receptor can support a useful image with a shorter or lower exposure when the operator selects appropriate settings, as described in the technical imaging manual.
Software can also enlarge a region, change contrast, and help organize images for comparison. These tools support the dentist's judgment. They don't turn an image into an automatic diagnosis, and they don't eliminate the need for correct positioning and thoughtful clinical examination.
For patients undergoing extensive treatment, digital records can also be reviewed alongside other planning information. For example, implant planning may require a different type of imaging, as outlined in discussions of the dental implants procedure.
The Radiation Question in Real Numbers
A patient's dose depends on more than whether the office uses a digital sensor. The receptor, exposure settings, beam shape, positioning, and number of views all affect the result. Digital systems can record a useful image with less exposure than older film when the operator selects suitable settings, but the technique at the chair matters just as much.
A Health Physics Society dose table lists 35 µSv for a full-mouth series using digital or F-speed film with rectangular collimation, compared with 388 µSv for D-speed film with round collimation. Under those listed conditions, that equals about a 91% reduction in effective dose, as shown in the Health Physics Society dose table.
The same table lists approximately 5 µSv for four bitewings with digital or F-speed film and rectangular collimation, compared with 38 µSv with round collimation. The comparison makes the chairside choices clear. A detector affects sensitivity, while collimation and positioning control how much tissue receives the primary beam.
Typical effective radiation dose by source
| Source | Approximate Effective Dose (µSv) | Relative Scale |
|---|---|---|
| Four bitewings, digital or F-speed film with rectangular collimation | 5 | Very low |
| Full-mouth series, digital or F-speed film with rectangular collimation | 35 | Low |
| Four bitewings, digital receptors with round collimation | 38 | Higher than rectangular collimation |
| Full-mouth series, D-speed film with round collimation | 388 | Much higher than the listed digital, rectangular-collimation example |
| Typical intraoral dental X-ray imaging | 1–8 | Among the lowest routinely used diagnostic imaging ranges |
| Typical panoramic examination | 4–30 | Low, with a wider field than an intraoral image |
Typical effective-dose ranges for intraoral dental X-rays are 1–8 µSv, while panoramic examinations are 4–30 µSv, consistent with the dental imaging guidance from the International Atomic Energy Agency. These ranges describe common imaging categories, not the exact dose for every patient, machine, or examination.
What changes the exposure
The operator sets factors such as exposure time, tube voltage, and tube current. Shortening the exposure can lower the dose, provided the image still contains enough information for diagnosis. Rectangular collimation narrows the beam to match the receptor more closely than a round cone, reducing the irradiated area when the receptor is positioned correctly.
Sensor sensitivity also matters. A digital receptor or PSP plate may need less exposure than older film. Poor alignment, however, can produce a distorted or incomplete image and make a retake necessary. The practical goal is the lowest exposure that produces an image the dentist can use, not the smallest number regardless of image quality.
For a patient-friendly explanation of why dentists order different views, the dental X-rays guide offers useful background. At the appointment, ask whether the planned image is focused on a symptom or part of a broader examination. That question connects the number of views to the clinical reason for taking them.
What Each Type of Dental Image Tells You
Dental X-rays aren't interchangeable snapshots. Each one answers a different clinical question, and the right choice depends on what your dentist needs to see.
Bitewings find hidden contact-point decay
A bitewing image captures portions of the upper and lower back teeth in one view. The patient bites on a small tab while the receptor records the crowns and nearby supporting bone. Dentists use bitewings to inspect between teeth, where a visual examination often can't reach, and to assess early changes in the bone height.
A set of four bitewings is commonly used when the dentist needs coverage of the posterior teeth on both sides. The decision should still reflect your examination, symptoms, previous findings, and current risk rather than an automatic assumption that every patient needs the same views at every visit.
Periapicals follow one tooth to its root
A periapical image includes the entire tooth, from crown through root tip, along with the surrounding bone. It's useful when you report persistent sensitivity or pain, when the dentist suspects an abscess, after trauma, or when a tooth may need endodontic treatment.
A 2021 dosimetry study reported a mean effective dose of 0.8 µSv for a single intraoral periapical image, with a reported range of 0.1–2.6 µSv, as published in this peer-reviewed dosimetry study. The dose for a specific image can vary with the equipment and exposure factors.
Panoramic imaging gives a wide map
A panoramic unit rotates around the head and creates one broad, relatively flat image of both jaws. It can help evaluate wisdom-tooth position, general jaw structures, orthodontic development, and some aspects of implant planning. Because it covers a large area, it can't provide the same fine detail for a single tooth as an intraoral periapical image.
CBCT adds depth when two dimensions aren't enough
Cone-beam computed tomography creates a three-dimensional representation of selected facial structures. It may be justified for complex implant planning, unusual root-canal anatomy, impacted teeth, or jaw pathology when a two-dimensional image can't answer the question.
A 2021 review reported average effective doses of 17.93 µSv for panoramic examinations and 121.09 µSv for CBCT, as reported in the review of dental imaging dose. Those figures help explain why CBCT shouldn't be treated as a routine substitute for a focused intraoral image.
| Imaging Type | What It Shows | Typical Dose (µSv) | When It Is Used |
|---|---|---|---|
| Bitewing | Crowns of back teeth, contacts, and nearby bone levels | About 5 for four views with rectangular collimation | Suspected or monitored decay between teeth and early bone changes |
| Periapical | One tooth from crown to root tip | Mean 0.8 for one image | Pain, trauma, root concerns, or suspected infection |
| Panoramic | Both jaws and broad surrounding structures | Average 17.93 | Wisdom teeth, orthodontic assessment, and broad jaw review |
| CBCT | Three-dimensional teeth, jaws, and related anatomy | Average 121.09 | Complex implant, endodontic, or jaw cases |
If you're dealing with a painful or infected tooth, a focused discussion of root canal treatment can help explain why a periapical image may be more useful than a wide scan.
What the Experience Feels Like for the Patient
The technical difference between film and digital imaging becomes physical in a very specific way: digital imaging usually reduces the time you need to hold still, but an intraoral sensor can still feel bulky. It's rigid, and it may press against sensitive tissue behind the teeth. Your dental team can reposition it, use a different receptor size when appropriate, or pause if the gag reflex becomes difficult.
A bitewing tab usually rests between the molars while you close around it. A periapical sensor may sit deeper because it must capture the root and surrounding bone. The exposure itself is brief, and the sensor doesn't remain in your mouth any longer than needed for positioning and capture.
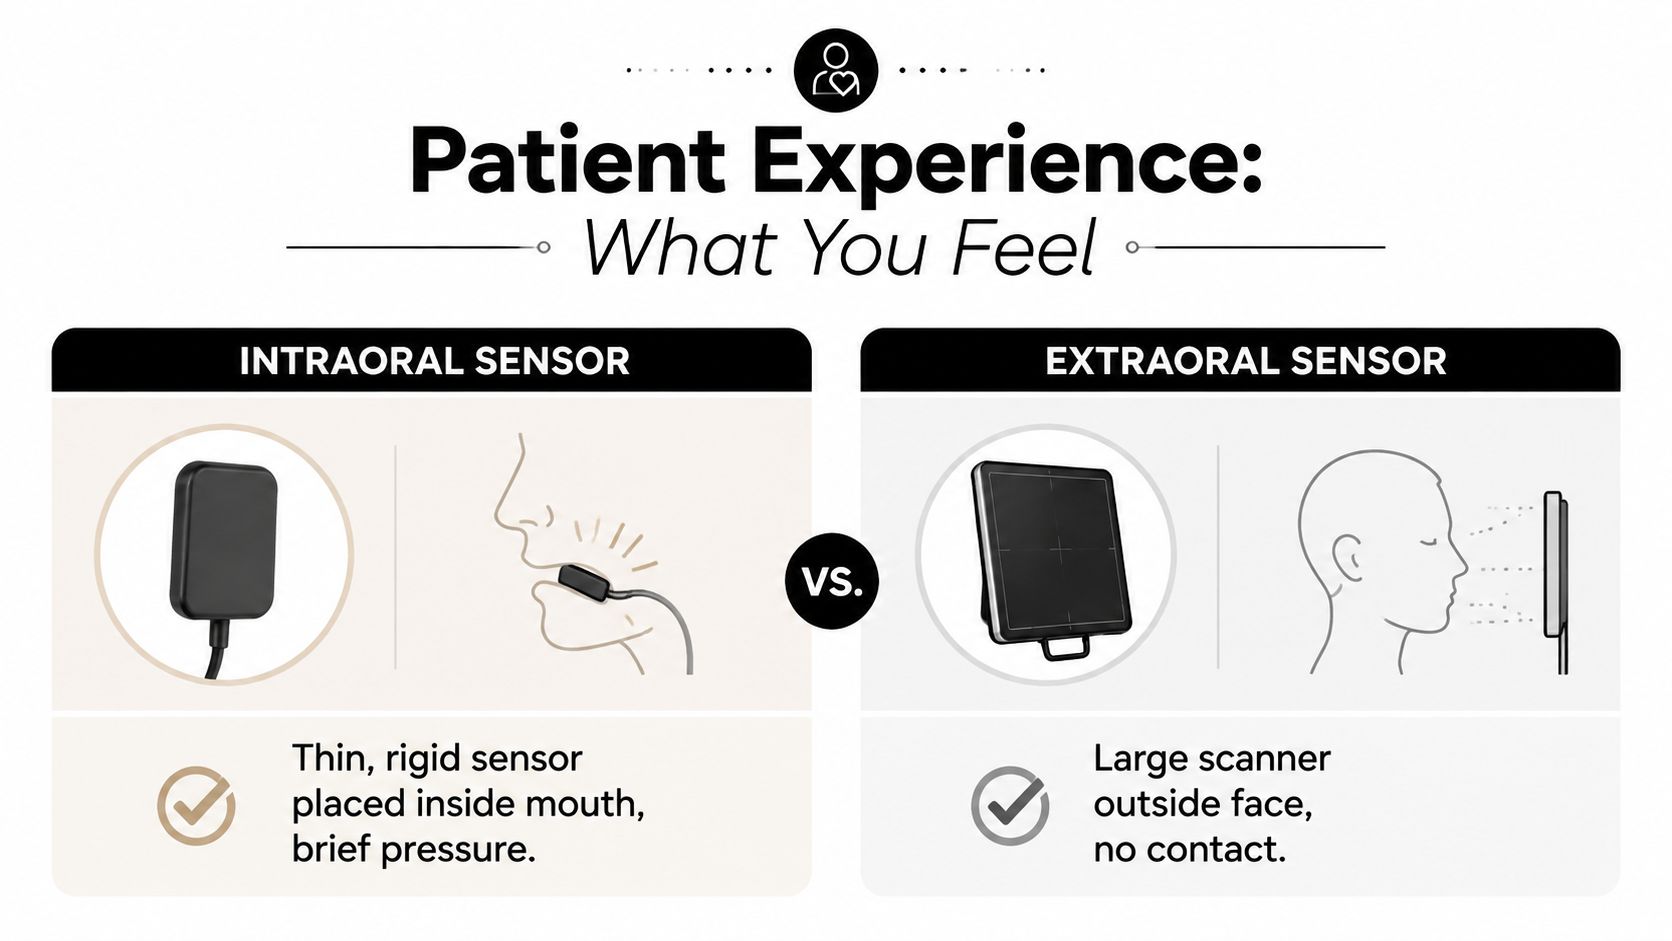
Extraoral imaging feels different. For a panoramic image, you stand or sit while the machine moves around your head, and you follow instructions to keep your tongue and jaw in a specific position. CBCT positioning also happens outside the mouth, often with the patient standing or seated while the scanner captures the selected volume.
The appointment has a rhythm
Your total visit depends on the number and type of views, the reason for imaging, and whether the team needs to reposition a sensor. A full bitewing series typically adds three to five minutes, panoramic imaging takes under a minute, and CBCT involves under thirty seconds of actual exposure, according to the patient-experience guidance supplied for this article. The exposure time and the time spent positioning aren't the same thing, so a scan that takes a short time to capture can still require careful setup.
The monitor preview is useful for more than convenience. If an image doesn't include the intended area, the dental team can recognize that immediately and decide whether a retake is necessary. That's preferable to discovering a problem later, after the appointment has ended.
You won't feel heat, pressure from radiation, or lingering soreness after the exposure. Any discomfort comes from holding the receptor or maintaining the required position, and it ends when the sensor is removed. If you're concerned about gagging, tell the assistant before imaging begins. Small sensors, softened edges, careful breathing instructions, and topical aids may make the process easier for some patients.
This short video provides another visual explanation of the patient experience:
A dental X-ray is also separate from procedures that involve tissue manipulation. For example, the experience described in information about tooth extraction in Midtown Manhattan includes different sensations and aftercare.
Safety, Pregnancy, and Outdated Assumptions
A safe imaging plan follows the clinical question, not a fixed calendar. The dentist weighs symptoms, examination findings, age, caries risk, periodontal concerns, earlier images, and the problem being investigated. A patient with pain may need a focused image promptly, while someone with stable findings may not need the same views.
Pregnancy calls for a specific explanation. Guidance from the American Academy of Oral and Maxillofacial Radiology states that fetal dose from teeth-and-jaw imaging is below 10 microGy and reports no evidence-based fetal risk from conventional dental imaging, as described in its 2025 pregnancy and dental imaging brochure. If an image is clinically necessary, postponing it solely because of pregnancy can leave an infection, fracture, or other condition unassessed.
The shielding conversation has changed
Many patients learned that a lead apron and thyroid collar belonged in every dental X-ray appointment. The same AAOMR guidance no longer recommends routine lead aprons and thyroid shields for these examinations when modern equipment, beam restriction, and accurate positioning are used. Some practices may still use shielding in particular circumstances or during certain extraoral examinations, and local policies can differ.
The change reflects where dose reduction begins: ordering only images that address a clinical need, aiming the beam accurately, limiting the field size, choosing suitable exposure settings, and preventing avoidable retakes. The detector is only one part of the system. A poorly positioned receptor or an image that misses the area of interest can require another exposure, so careful chairside setup matters.
A shield that interferes with the image or triggers an automatic retake may not improve overall protection. Radiation safety is more like measuring ingredients for a recipe than adding one protective item at the end. Each technique choice affects the final exposure.
For pregnancy: Tell the dental team you're pregnant or may be pregnant before imaging. They can decide whether the image can wait or whether its diagnostic benefit makes it appropriate now.
The decision depends on your symptoms and the information the dentist needs. If you feel anxious, ask what finding the image is meant to show, whether an earlier image is available, and how the team will keep the series focused. Clear answers are more useful than blanket reassurance or blanket fear.
Smart Questions to Ask at Your Next Visit
You don't need to understand detector physics to participate in a good imaging decision. A few direct questions can reveal whether the proposed image is necessary today, whether an older image may answer the same question, and how the office controls exposure.
Start with the reason for the image
Ask, “What specific question will this X-ray answer?” A useful answer might involve decay between two teeth, the root of a painful tooth, bone levels, or planning information that cannot be obtained from a two-dimensional view. If the answer is unclear, ask whether the image can be deferred until the next examination.
You can also ask:
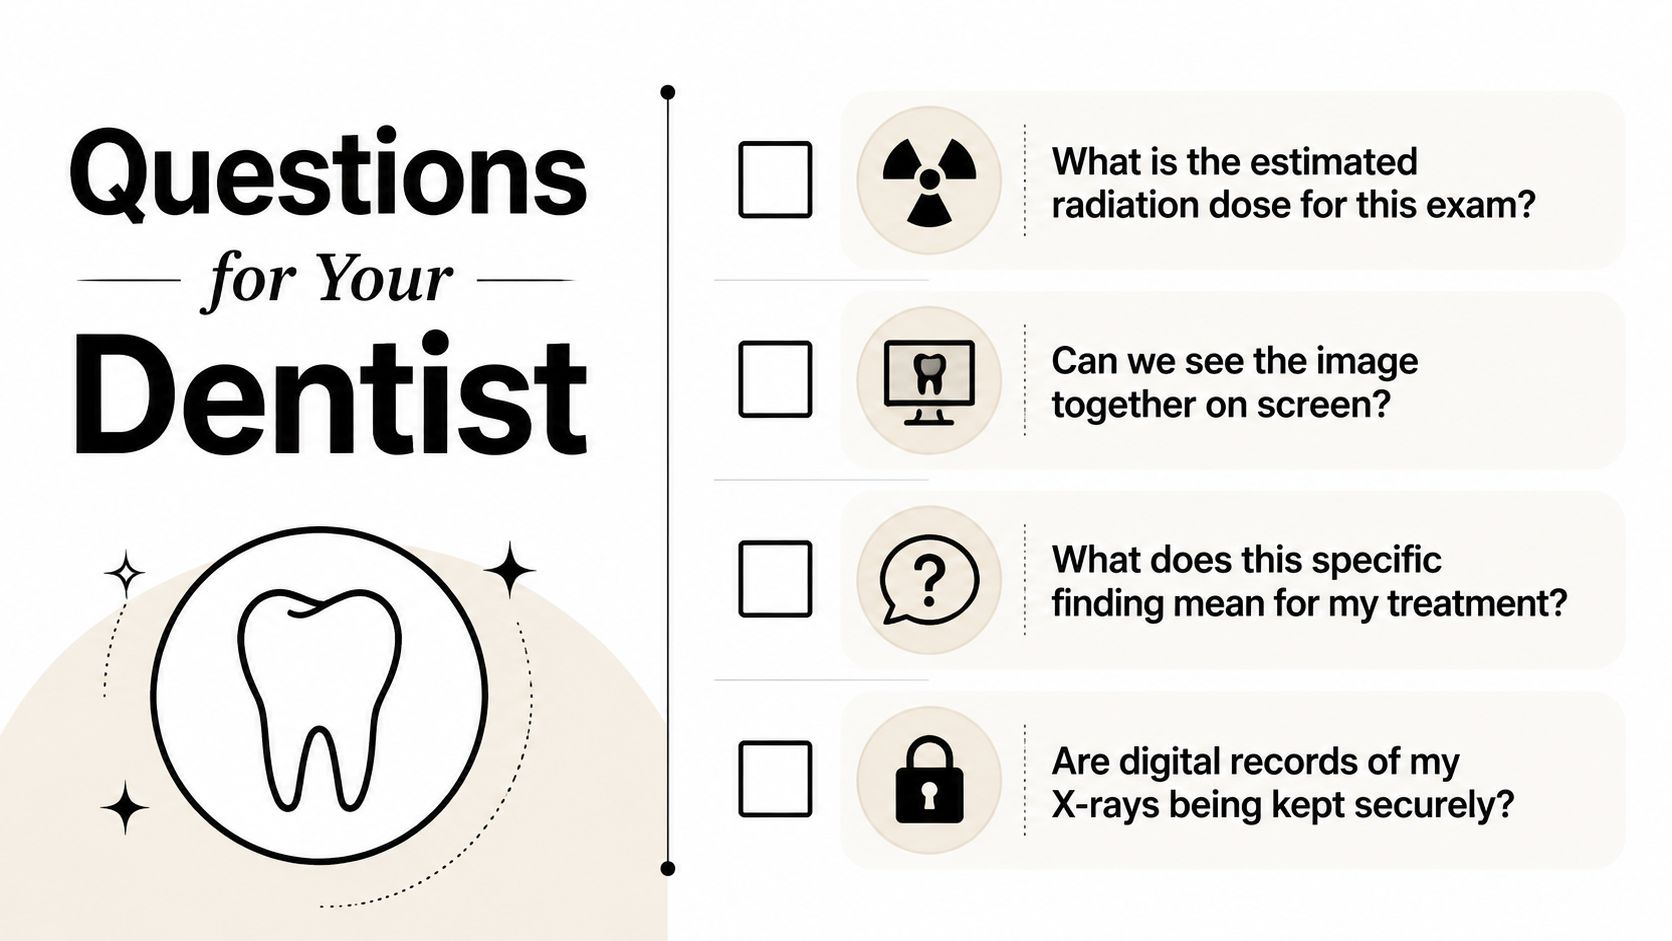
- Dose: “What's the estimated effective dose for this specific exam, in microsieverts?”
- Views: “Do I need every image in this series today, or are some views for a later visit?”
- Previous records: “Can you review my earlier X-rays before taking new images?”
- Technique: “Does this system use rectangular collimation, and how do you reduce the chance of a retake?”
A dentist may not have a single dose number printed for every appointment, because dose depends on the machine, receptor, exposure settings, field size, and patient anatomy. Still, asking prompts the team to discuss the actual exam rather than treating “digital” as a complete safety explanation.
Ask how the image becomes part of your care
Digital files can be stored and compared, so ask whether the office keeps prior images in a format that can be reviewed during future visits or shared with another clinician when appropriate. You can ask to see the image on the monitor and request a plain-language explanation of any finding.
If the practice uses AI-assisted image review, ask what role it plays. Does it flag areas for the dentist to inspect, or does the software support another part of the workflow? The dentist remains responsible for interpreting the image and relating it to your examination and symptoms.
The checklist below keeps the conversation focused:
- Review: “Can we look at the image together on screen?”
- Meaning: “What does this finding mean for my treatment options?”
- Storage: “Are my digital X-ray records being kept securely?”
- Shielding: “Is a thyroid collar or other shielding appropriate for this type of imaging?”
- Retakes: “If an image needs to be repeated, what caused the problem and can positioning be changed?”
Specific questions don't make you difficult. They help the dental team tailor the examination, avoid unnecessary duplication, and explain why a particular image belongs in your care plan.
Paul L. Gregory, DDS offers on-site digital X-rays, chairside image review, and family, cosmetic, restorative, implant, and emergency dental care in Midtown Manhattan. To discuss a focused imaging plan for your needs, visit Paul L. Gregory, DDS and schedule a consultation.